10 Handwriting Tips from an Occupational Therapist

Handwriting can look simple from the outside, but it asks a lot from a child’s body and brain. Posture, hand strength, pencil grasp, visual tracking, attention, memory and confidence all have to work together.
As an occupational therapist, handwriting support often starts with one question: what is making writing harder than it needs to be? The answer is not always “try harder” or “write more”. Often, small changes to the setup, tools and routine make a big difference.
This advice is general information only. If handwriting is causing pain, distress, major delays or ongoing school difficulty, a qualified occupational therapist can give individual guidance.

Start with the body before the pencil
1. Check sitting posture first
Good handwriting starts below the shoulders. A child who is sliding off the chair, dangling their feet or leaning heavily on the table has to work harder before they even pick up the pencil.
Aim for:
Feet flat on the floor or on a footrest
Hips, knees and ankles close to 90 degrees
Paper resting slightly to the side of the writing hand
Non-writing hand holding the page steady
If a child is small for the chair, use a sturdy box or step under the feet. This simple change can improve control because the body feels more grounded.
2. Build shoulder and core strength
Handwriting is not just a finger task. The shoulder, trunk and wrist provide the stable base that lets the fingers move with control.
Useful activities include:
Wall push-ups
Animal walks, such as bear walks or crab walks
Climbing at the playground
Lying on the tummy to draw or colour
Carrying books or helping with safe household jobs
These activities do not need to look like therapy. A few minutes of movement before table work can help some children settle and write with better control.
3. Keep the wrist relaxed and supported
A hooked wrist, floating wrist or tightly flexed wrist can make writing tiring. Ideally, the wrist rests lightly on the table and sits in a slightly extended position, with the fingers doing most of the fine movement.
Try placing the paper on a slight angle. A sloped board can also help some children keep the wrist in a better position. It does not need to be fancy, even a firm folder can work for short practice.
Make the pencil easier to control
4. Look at pencil grasp without forcing it
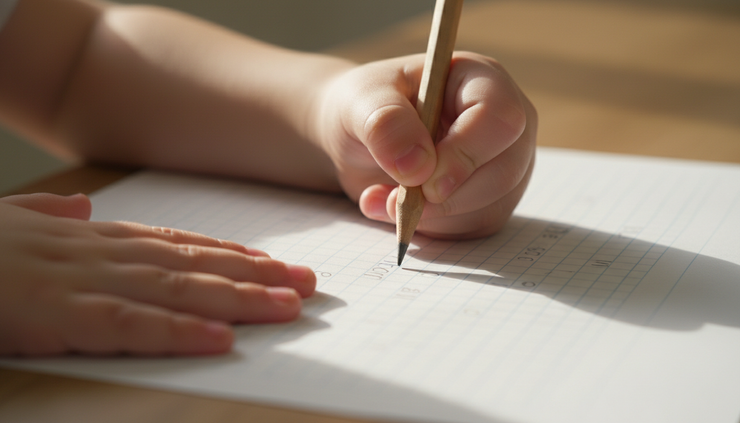
Many children develop a functional grasp that does not match the “perfect” picture. The main question is whether the grasp allows comfort, control and endurance.
A mature grasp usually uses the thumb, index and middle finger while the ring and little fingers rest into the palm. If a child wraps the thumb, grips too tightly or complains of a sore hand, they may need support.
Short pencils, triangular pencils or a simple pencil grip can help. Avoid changing grasp constantly. Too many corrections can make writing feel frustrating.
5. Reduce pencil pressure
Heavy pencil pressure is common. It may come from reduced hand awareness, anxiety about neatness or poor control. It can lead to hand fatigue and broken pencil tips.
Try these ideas:
Write with a mechanical pencil for short tasks
Practise “ghost writing” with very light marks
Use carbon paper to show how much pressure is going through the page
Draw roads and ask the child to keep the pencil “driving lightly”
The aim is not weak writing. The aim is controlled pressure that the child can adjust.
6. Strengthen the small hand muscles
Fine motor strength helps children control letters, spacing and speed. Short, playful tasks work better than long drills.
Good options include:
Peg games
Playdough pinching and rolling
Tweezers or tongs for sorting small objects
Threading beads
Scrunching paper into balls
Spray bottle play outside
Keep it fun and brief. A tired hand often produces messier writing, so more practice is not always better.
Teach letters in a way the brain can remember
7. Practise letter formation, not just neatness
Neat writing matters, but formation comes first. If a child starts letters from the bottom, reverses direction or draws letters in many separate strokes, writing becomes slower and less automatic.
Teach letters with clear starting points and consistent language. For example, “start at the top, go down, lift, across”. Use the same words each time.
Multisensory practice can help:
Write letters in sand, shaving foam or rice
Trace large letters in the air
Build letters with playdough
Use chalk outside before pencil practice
Big movements often help children learn the pattern before they refine it on paper.

8. Use lined paper that matches the child’s level
Paper can either guide or overwhelm. Some children need wide lines, dotted thirds or highlighted baselines. Others do better with simple plain lines once they understand letter size.
For younger writers, focus on three letter groups:
Tall letters, such as `b`, `h`, `l` and `t`
Small letters, such as `a`, `c`, `e` and `m`
Tail letters, such as `g`, `j`, `p` and `y`
A highlighted bottom line can remind children where letters “sit”. For some, a green starting dot and red stopping dot gives a clear visual cue.
9. Work on spacing in concrete ways
Spacing is hard because it asks children to think about the words, the sentence and the page layout at the same time.
Use a physical spacer if needed. A craft stick, finger space tool or small sticker can help a child see the gap between words. For older children, teach them to check spacing after writing rather than interrupting every word.
A useful self-check is:
Can I see where each word starts?
Are my letters sitting on the line?
Can someone else read this without help?
This builds independence without turning every task into correction.
Keep practice short and purposeful
10. Choose quality over quantity
Long handwriting sessions can backfire. Once the hand is tired, the child may practise poor patterns and feel discouraged.
Short practice is usually better. Try five to ten minutes with one clear goal, such as letter starts, spacing or pencil pressure. End before frustration peaks.
For school-aged children, handwriting practice should connect to real writing where possible. A short birthday card, shopping list, footy score chart or weekend journal can feel more meaningful than copying rows of letters.

When to ask for extra support
Handwriting varies widely, especially in the early years. Still, it may be time to seek help if a child:
Avoids writing or becomes very upset during writing tasks
Has pain or fatigue in the hand, wrist, arm or shoulder
Writes much more slowly than classmates
Has handwriting that teachers or family often cannot read
Struggles with letter formation after repeated teaching
Presses so hard the pencil breaks or marks go through the page
Has trouble with dressing, cutlery, scissors or other fine motor tasks as well
An occupational therapist can look at the whole picture, including posture, strength, coordination, sensory processing, visual motor skills and classroom demands.
The best handwriting tips are the ones that make writing feel possible. Start with the body, adjust the tools, teach letters clearly and keep practice short. When children feel more comfortable and in control, handwriting has a much better chance to improve.